Rim to Rim
Training and Preparation
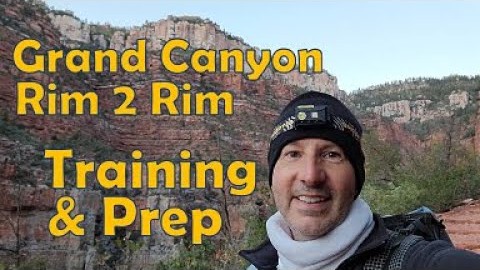
Training, gear, and nutrition tips for a Grand Canyon Rim to Rim hike.
Grand Canyon Rim to Rim Training and Preparation
A few months after I finished my Grand Canyon Rim to Rim hike in one day, I sat down to
recap exactly how I got ready for it: the training, the gear, the food, and the mistakes
I'd fix next time. If you're staring down your own r2r and wondering where to start,
this is everything I wish someone had laid out for me. Watch here!
A Slightly Different Rim to Rim
My trip was a little unusual - instead of staying in the North Rim's indoor lodging, I shuttled up, camped at the North Rim campground, and then carried all of that camping gear across the canyon to the South Rim. I took the shuttle up in early October, arrived around 6:30pm, set up my tent, and grabbed some food from the general store before turning in early. I woke up at 4:30am to 37 degree temps, layered up, and hit the trailhead. I took the Bright Angel Trail down to the river and finished at the South Rim in 14.5 hours. Here's how I got ready for that day, piece by piece.Training: Knees First, Everything Else Second
The thing nobody tells you about the descent is that it's not "free mileage" just because you're going downhill. Dropping a mile of elevation is a sustained, focused pounding on your knees and quads, and it adds up fast. So my training centered on knee stability and leg strength: stair climbers (or real stairs in a parking garage), lunges with some added weight, planks and core work, and as much hiking on actual dirt as I could get, since that builds up all the small stabilizer muscles around your calves and feet that a treadmill just doesn't touch. One trick that worked well on the StairMaster - turn around and face backward, so you're pushing down against the steps with your knees. It mimics that descending strain almost perfectly.
I also mixed in running and biking for cardio and endurance, and tried to get in several
10+ mile hikes before the trip. The one thing I skimped on was stretching, and it caught
up with me - my hamstrings got tight fast as my legs got stronger, and my lower back
started aching because of it. Once I caught up on stretching, it settled down, but it's
the one piece of advice I'd underline twice for anyone else prepping for this hike.
The Gear: About 15 Pounds All In
I packed as light as I could into a Z-Packs Arc Haul, and everything - including my full camping setup - came in around 15 pounds with food and water. On my body: a base layer micro-fleece, a sun hoodie over that, and a quarter-zip fleece on top, with reflective tights and running shorts on my legs, plus a fleece hat and a fleece buff I could pull up over my nose on cold mornings. For camp, I carried a 36 degree synthetic bag, a Nemo Tensor sleeping pad, a Sea to Summit Aeros pillow, and a Z-Packs Altaplex tent, which had plenty of room even at six-foot-one.
A few things I'd call non-negotiable: rain gear (I used Frogg Toggs jacket and pants) in
case conditions turn, a small first aid and toiletry kit, and a backup water filter (a
Katadyne BeFree) even though I mostly relied on the water taps along the trail. For
electronics, I brought an Anchor power bank, a Nitecore headlamp that never needed a
recharge, a cheap digital watch for pacing, a GoPro Hero 7 Black with a small tripod, and
a Garmin inReach Mini so I could send my wife preset check-in messages at each milestone.
For footwear, I'm firmly on Team Trail Runners over boots - lighter, more breathable, and
with a rock plate for the rugged sections - paired with wool socks for both the cold
morning and the hot afternoon.
Nutrition: Nothing to Cook, Everything to Fuel
My whole food strategy was built around not carrying any cooking gear, so everything was ready to eat. Breakfast was a Complete Cookie, with Lara bars and trail mix to graze on throughout the day for quick energy. Lunch was a tuna packet (packed in sunflower oil for the extra calories, not water) with mayo packets and crackers - cool, filling, and full of protein. I mixed Liquid I.V. and Nuun tablets in my water for electrolytes, since a hike like this drains a lot of sodium through sweat, and I leaned on caffeine chews for a boost on the climb out. And no hiking trip is complete for me without a Snickers bar - sugar and morale, all in one wrapper.The Advice That Actually Matters
Watch several other people's r2r videos, not just one - everyone hikes it at a different time of year with different logistics, and those different perspectives matter. Check the park's website for trail and water tap status before you go. Train your knees, core, and endurance together, and don't neglect stretching. Pack light, but don't skimp on food, clothing layers, or backup water filtration.
And the best piece of advice I got came from a stranger on the shuttle to the North Rim.
I asked him what his tip was for the hike, and he just said: "don't die." It sounds like a
joke, but it's really the right mindset - it's on you to be prepared enough to get
yourself across the canyon, not to hope someone bails you out if it goes sideways. Be
ready for the mileage, the descent, the heat, and the cold, and you'll have an incredible
day out there.
Grand Canyon Rim 2
Rim
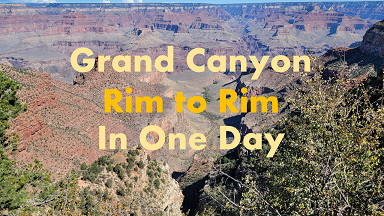
Hiking the Grand Canyon from North Rim to South Rim in one day.
Hiking the Grand Canyon from North Rim to South Rim in one day.

Follow Me
@cory_outdoors